Skip to content


A good kaju katli recipe depends on finely ground cashews, correctly cooked sugar syrup and removing the mixture from the heat at the right time. Instead of relying only on cooking time, watch how the mixture looks and feels at every stage.
Kaju katli has a short ingredient list, but getting that smooth, soft texture can still take a little attention. Grind the cashews too much, and they may turn oily. Cook the mixture too long, and the katli can become hard. Stop too early, and it may remain sticky.
So, if you’re wondering how to make kaju katli at home, focus less on the clock and more on the texture at each stage.
What Goes Into Homemade Kaju Katli?
The basic kaju katli ingredients are simple:
-
2 cups cashews
-
1 cup sugar
-
½ cup water
-
1 teaspoon ghee
-
A few drops of rose water, optional
-
Edible silver leaf, optional
Keep the cashews completely dry and at room temperature before you start. Any moisture can affect how finely they grind and may make the mixture harder to manage later.
Tip: Do not wash or soak the cashews before grinding. Dry cashews are easier to turn into a fine, loose powder.
How to Make Kaju Katli: Follow These 7 Texture Stages
If you're making kaju katli at home for the first time, don't worry! A little help from your everyday home appliances can make the preparation easier. Just keep an eye on the texture at each stage, and follow these simple cues to get your kaju katli just right.
Stage 1: Get the Cashew Powder Fine, Not Oily
The final texture begins before the pan even goes on the heat.
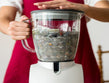
Add the cashews to a mixer grinder and grind them in short pulses. You can use a mixer grinder by Wipro Appliances to turn the cashews into a fine powder. Just remember to grind them in short pulses and check the texture in between.
Avoid running the appliance continuously, as cashews naturally contain oils. Too much grinding can warm them up and turn the powder into a sticky paste.
You want the powder to stay fine and loose.
If there are a few coarse pieces left, sieve the powder and grind only those pieces again.
Your cashew powder is ready when it:
-
Feels fine between your fingers
-
Does not form oily clumps
-
Has no large cashew pieces
-
Remains dry and loose
Tip: Stop grinding as soon as you reach the right consistency. Grinding it even finer can release more oil from the cashews.
Stage 2: Keep the Sugar Syrup Light
Add the sugar and water to a pan and place it on an induction cooktop.
Heat until the sugar dissolves completely. Once it begins to simmer, keep the heat controlled rather than allowing the syrup to boil aggressively.
Kaju katli does not need an overly thick sugar syrup. You are looking for a lightly sticky consistency.
A quick syrup check:
-
Take a tiny amount on a spoon and let it cool enough to touch safely.
-
It should feel slightly sticky between your fingers without becoming thick or stiff.
-
Avoid waiting for the syrup to become very thick. If you cook it too long before adding the cashew powder, the katli can firm up much faster later.
Quick Tip: An induction cooktop can be useful here, as its adjustable heat settings make it easier to control the temperature while preparing the sugar syrup. This is especially helpful when you want the syrup to thicken gently without overcooking it.
Stage 3: Add the Cashew Powder Gradually
Reduce the heat and start adding the ground cashews a little at a time. Keep stirring as you add them so the powder blends evenly with the syrup and does not form lumps.
The mixture will look loose initially. As it continues cooking, it will thicken and gradually begin leaving the sides of the pan.
Tip: Keep the heat low at this stage. Gentle cooking gives you more control over the consistency and reduces the chances of the mixture drying out too quickly.
Stage 4: Test the Mixture Before Removing It From the Heat
Do not wait for the mixture to look completely dry. Take a small portion, let it cool for a few seconds, and gently roll it between your fingers.
It is ready when it:
-
Forms a soft ball
-
Holds its shape
-
Does not stick heavily to your fingers
-
Still feels soft enough to flatten
If it feels very sticky, give it a little more time on low heat. If it already feels dry or crumbly, remove it immediately.
Tip: It is better to remove the mixture while it is still slightly soft than to keep cooking until it looks dry. It will continue to firm up as it cools.
Stage 5: Work With the Mixture While It Is Warm
Transfer the cooked mixture onto a lightly greased surface or parchment paper.
Let it cool just enough to handle comfortably.
Apply a little ghee to your palms and gently bring the mixture together. There is no need to knead it aggressively. A few light folds are enough to create a smoother dough-like texture.
Tip: Do not leave the mixture sitting for too long. Once it cools completely, it becomes harder to shape and may develop cracks while rolling.
Stage 6: Roll Before the Mixture Firms Up
Place the warm mixture between two sheets of parchment paper and roll it evenly.
Keep the pressure consistent so the sheet does not become thick in one area and thin in another.
Aim for a thin layer that is still sturdy enough to lift after cutting.
Once you have the thickness you want, remove the top parchment sheet. You can add edible silver leaf at this stage if you are using it.
Tip: Roll from the centre towards the edges to make it easier to maintain an even thickness.
Stage 7: Cut While It Is Still Slightly Warm
Use a sharp knife to make diagonal cuts in one direction and then cut across them to form the familiar diamond shapes.
Do this step while the katli is still slightly warm rather than waiting until it becomes completely firm.
Allow the pieces to cool fully before separating them. This gives them enough time to set and makes them less likely to break.
Tip: Make the cuts first and separate the pieces only after cooling. This helps the diamonds retain their shape.
The Little Fixes That Make Your Kaju Katli Turn Out Just Right
Small texture problems usually point to a specific stage in the process.
|
Problem |
Possible Reason |
What to Change |
|
Kaju katli feels grainy |
Cashews were too coarsely ground |
Sieve the powder before cooking |
|
Cashew powder looks oily |
Cashews were ground for too long |
Use short pulses |
|
Mixture stays sticky |
It needs a little more cooking |
Continue briefly on low heat |
|
Katli becomes hard |
Mixture was overcooked |
Remove it earlier |
|
Dough cracks while rolling |
It cooled too much or became dry |
Roll while still warm |
|
Pieces break while cutting |
Katli became too firm first |
Cut it slightly earlier |
Use One Small Piece as Your Final Texture Test
Before rolling the entire batch, pinch off a small piece of the warm mixture and flatten it between your fingers.
-
If it holds together, feels smooth and bends slightly without cracking, you are ready to roll.
-
If it breaks immediately, the mixture may already be drying out, so work quickly.
-
If it sticks heavily to your fingers, it may need a little more cooking.
That small test can help you correct the texture before the whole batch is rolled.
Building a Festive Sweet Menu Around Kaju Katli
Kaju katli can be a lovely addition to a festive sweet spread, especially when you want something rich, soft, and easy to serve.
If you're exploring traditional Ram Navmi festive sweet recipes, why not add a few family favourites alongside your homemade kaju katli?
Here are some sweets you can make:
-
Suji Halwa: A warm, comforting sweet that's easy to prepare at home.
-
Rice Kheer: A creamy favourite for anyone who loves milk-based desserts.
-
Coconut Ladoo: A lovely choice if you want something sweet, nutty and easy to share.
The best part? You can also enjoy these favourites during Diwali! Bring back your homemade kaju katli and try a few Diwali ladoo recipes, like besan ladoo or motichoor ladoo, to make your festive spread even more special.
FAQs
-
Why does my kaju katli become hard after cooling?
The mixture was likely cooked for too long. Remove it from the heat once it forms a soft, non-sticky ball, rather than waiting until it looks completely dry.
-
Why does kaju katli become oily?
Grinding cashews for too long can make your powder oily. Use short pulses and stop once the cashews reach a fine, dry consistency.
-
Should cashews be roasted before making kaju katli?
No. Regular kaju katli is generally made with dry, unroasted cashews, so the flavour and colour remain mild.
-
Can I make kaju katli without edible silver leaf?
Yes. Silver leaf is optional and does not affect the texture or preparation.
-
When should I cut kaju katli?
Cut it while it is still slightly warm and pliable. If it becomes completely firm first, creating neat diamond-shaped pieces can become more difficult.
-
What other sweets can I make alongside kaju katli?
If you're preparing a festive sweet platter, you can pair kaju katli with homemade besan ladoo for a lovely mix of flavours and textures. The rich, nutty taste of kaju katli goes well with the soft, slightly crumbly texture of besan ladoos, giving your family more variety to enjoy.