Skip to content


Malpua stays crisp for longer when the batter, frying heat and syrup timing are planned around serving. Rest the batter before frying, keep the syrup light and warm, and shorten the soaking time when the malpuas need to sit before reaching the table. Avoid stacking them while warm so steam does not soften the edges.
Malpua often tastes best beside the frying pan: the edges are crisp, the centre is tender, and the syrup has only just begun to soak in. During a festive meal, however, the first batch may sit while the remaining malpuas are cooked. By serving time, some can feel dry while others become overly soft.
The way around this is to plan the malpua recipe around serving time. Prepare the batter early, keep the syrup warm rather than boiling, and dip each malpua only long enough to coat it. This approach makes festive batch-cooking easier without sacrificing the contrast between crisp edges and a syrupy centre.
Malpua also fits naturally among traditional festive sweets because the final texture depends not only on the recipe itself, but also on when the dessert is fried, soaked and served.
What You Will Need for 10 to 12 Malpuas
For the Batter
-
1 cup maida
-
¼ cup fine semolina
-
¼ cup milk powder or khoya
-
½ teaspoon fennel seeds, lightly crushed
-
¼ teaspoon cardamom powder
-
1 cup milk, approximately
-
A pinch of salt
-
Ghee or oil for shallow-frying
For the Syrup
-
¾ cup sugar
-
½ cup water
-
¼ teaspoon cardamom powder
-
A few saffron strands, optional
-
½ teaspoon lemon juice
Keep chopped pistachios, almonds or rose petals ready for finishing.
Two Hours Before Serving: Prepare a Batter That Can Rest
Combine the maida, semolina, milk powder, fennel, cardamom and salt. Add milk gradually while whisking.
The batter should:
-
Pour from the ladle in a thick ribbon
-
Spread slightly without running across the pan
-
Look smooth but not unusually thin
-
Coat the back of a spoon
Cover and rest it for at least 30 minutes. Semolina absorbs moisture as it sits, so the batter may need a small splash of milk before frying.
This resting time is useful during festive cooking because the batter can wait while other dishes are prepared. The final consistency, however, should always be checked again rather than assuming it has remained unchanged.
If you are planning a larger festive menu with Diwali faral recipes, this make-ahead stage is especially useful because the batter can rest while other snacks and sweets are being prepared.
Wipro Appliance’s mixer grinder can also help with small festive-prep tasks at this stage, such as powdering cardamom or preparing finely ground sugar for other sweets being made alongside the malpua. The appliance can shorten the repetitive prep, while the cook still decides the texture needed for each recipe.
Thirty Minutes Before Serving: Make a Light Syrup
Add the sugar and water to a wide pan. Heat gently until the sugar dissolves, then simmer for a few minutes.
The syrup should feel slightly sticky between cooled fingers but should not form a thick thread. A dense syrup sits on the surface instead of moving into the malpua, while a very thin syrup can quickly make it soggy.
Add cardamom, saffron and lemon juice, then keep the syrup warm over the lowest heat.
The lemon juice is not meant to make the syrup sour. A small quantity helps keep the syrup smooth as multiple batches are dipped.
When Guests Are Nearly Ready: Begin Frying
Use a wide, shallow pan and maintain medium-low heat. The fat should be hot enough for the batter to rise gently around the edges, but it should not colour the malpua immediately.
Pour a small ladleful into the centre and allow it to spread naturally.
Watch the first malpua closely:
-
Spreading Too Far: The batter needs a little more flour.
-
Remaining Very Thick: Add milk one tablespoon at a time.
-
Darkening Immediately: Reduce the heat before continuing.
-
Breaking While Turning: Let the first side set for longer.
The first malpua is not simply a trial piece. It sets the batter and heat for the entire festive batch.
Use Steady Heat for Consistent Batches
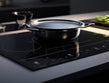
An induction cooktop by Wipro appliances can be useful here because both the frying fat and sugar syrup need controlled heat.
Use induction-compatible cookware and adjust the heat according to how quickly each malpua colours rather than depending on one fixed setting.
For every malpua:
-
Cook until the edges look set and golden.
-
Turn it gently with a flat spatula.
-
Cook the second side until evenly coloured.
-
Lift it out and let excess fat drain briefly.
-
Move it to the warm syrup while still hot.
Avoid increasing the heat to finish the batch faster. Dark edges can hide an undercooked, floury centre.
This is where kitchen appliances can make festive cooking easier: one can shorten repetitive prep while another helps with controlled heat, but colour, texture and timing still need to be judged by the cook.
Dip According to When the Malpua Will Be Eaten
This is where festive timing matters most.
-
Serving Immediately: Dip each hot malpua in warm syrup for about 20 to 30 seconds. Turn it once, remove it, and arrange it on the serving plate.
-
Serving After 20 to 30 Minutes: Give each malpua a shorter dip. Arrange them in a single layer and spoon a little warm syrup over them just before serving.
-
Serving Rabri with the Malpua: Keep the syrup coating light. Rabri adds another layer of moisture and sweetness, so heavily soaked malpuas can make the dessert feel excessive.
The aim is not to make every malpua absorb the maximum possible syrup. It is to leave enough structure for the edges to remain noticeable.
That timing-led approach is one reason malpua sits comfortably alongside traditional ladoo recipes for Diwali and other festive sweets where preparation, cooling and serving time can influence the final texture as much as the ingredient list itself.
Hold the Batch Without Trapping Steam
Do not stack freshly fried malpuas immediately. The steam between layers softens their surfaces before the syrup is even added.
For a festive spread:
-
Arrange them in one layer where possible.
-
Avoid covering them tightly while warm.
-
Keep extra syrup in a separate bowl.
-
Add nuts only after the final syrup coating.
-
Serve rabri separately rather than pouring it over the entire batch.
This lets each person choose a lighter or richer finish.
Let the Serving Time Guide the Recipe
Learning how to make malpua at home is not only about preparing batter and syrup. For festive occasions, the order in which the batch is fried, dipped and held can change the final texture.
Rest the batter, keep the syrup light and adjust the soaking time according to when the dessert will reach the table. That planning helps a homemade malpua recipe retain crisp edges while still delivering the warm, syrupy centre expected from the dish.
FAQ
-
Why does malpua become soggy?
The syrup may be too thin, the malpua may have soaked too long, or warm pieces may have been stacked.
-
Why is my malpua hard?
The batter may be too thick, or the malpua may have been fried over high heat.
-
Can the batter be prepared in advance?
Yes. Refrigerate it and recheck the consistency before frying.
-
Can malpua be made without milk powder or khoya?
Yes. Use milk and flour, though the flavour and richness will be lighter.
-
How should leftover malpua be reheated?
Warm it briefly and serve with a little separate syrup rather than soaking it again.