Skip to content


One-pot biryani works best when "one pot" does not become "everything at once." Build the masala fully before adding the rice, measure the water instead of estimating it, stir as little as possible and let the covered pot rest after cooking. That sequence keeps the grains separate while still giving the biryani enough flavour.
One-pot biryani saves washing and removes the need to manage rice and masala in separate vessels. The trade-off is that everything now depends on getting the order right.
The onions still need colour, the tomato and spices need time to cook, and soaked rice becomes easier to break once it enters the pot. The sequence that works most dependably is simple: prepare the rice first, finish the masala, add measured water and then leave the covered pot alone.
What Should You Prepare Before Cooking?
For three to four servings:
• 1½ cups basmati rice
• 2 tablespoons oil or ghee
• 1 large onion, thinly sliced
• 1 tomato, chopped
• 1 cup mixed vegetables
• ½ cup curd
• 1 teaspoon ginger-garlic paste
• 2 green chillies, slit
• 1 teaspoon biryani masala
• ½ teaspoon chilli powder
• ¼ teaspoon turmeric
• ½ teaspoon cumin seeds
• 1 bay leaf
• 1-inch cinnamon stick
• 3 cloves and 3 cardamom pods
• A handful each of mint and coriander
• 2¼ cups water
• Salt as required
Rinse the rice gently until the water is mostly clear. Soak for 20 minutes and drain well.
Also measure the cooking water now. Of all the rice cooker tips that carry over to one-pot biryani, measured liquid is one of the most useful because guessing after the rice goes in can quickly make the grains too soft.
Finish the Masala Before the Rice Enters
Heat the oil or ghee and add cumin, bay leaf, cinnamon, cloves and cardamom.
Once aromatic:
-
Brown the onions: Wait until the edges become golden.
-
Add the aromatics: Stir in ginger-garlic paste and green chillies.
-
Cook the tomato: Add tomato, turmeric, chilli powder, biryani masala and salt. Cook until the raw aroma disappears.
-
Add the curd: Lower the heat and stir continuously so it combines smoothly.
-
Finish with vegetables and herbs: Add the vegetables and half the mint and coriander. Cook for another two to three minutes.
If the masala catches at the bottom, loosen it with a spoonful or two of water rather than more oil.
This stage deserves patience. Once the rice is added, there is very little opportunity to correct an undercooked masala.
Once the Rice Goes In, Do Less
Spread the drained rice evenly over the masala instead of tipping it into one spot.
Then:
• Fold only once or twice.
• Pour in the measured water.
• Taste the liquid before covering; it should be slightly stronger in seasoning than the finished rice.
• Bring everything to a gentle, even boil.
• Reduce the heat and cover tightly.
This is different from a traditional layered Hyderabadi biryani, but the same respect for the rice still matters: once the grains begin cooking, repeated stirring works against separation.
Make One-Pot Cooking Actually Feel Easier
The advantage of using kitchen appliances for biryani should be less supervision, not simply moving the same work into another vessel.
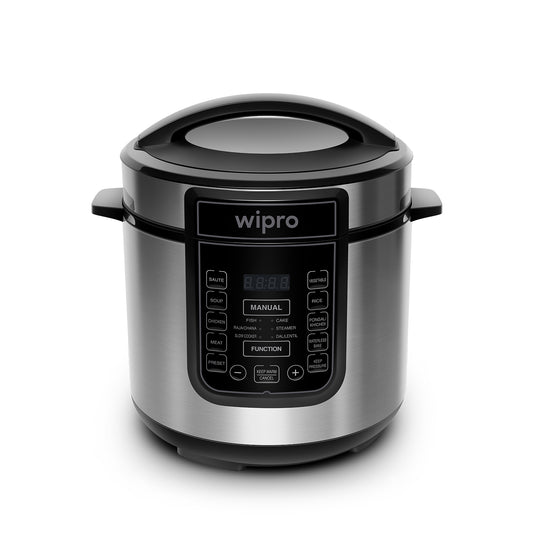
For a largely hands-off version, an electric pressure cooker by Wipro Appliances is useful because the masala can be sautéed and the rice cooked in the same appliance. The current Wipro Appliances electric pressure cooker range includes preset cooking functions and is designed for one-pot cooking. Once the rice and measured liquid are added, follow the appliance guidance for the quantity and type of rice being used.
If you prefer to see and control each stage, an induction cooktop by Wipro Appliances works with compatible heavy-bottomed cookware and lets you lower the heat once the liquid reaches a gentle boil. Wipro Appliances currently lists induction cooktops within its cooking-appliance range.
The same principle behind many multicooker recipes applies here: let the appliance simplify heat management, but do not skip the flavour-building stages before the rice cooks.
Once the Lid Goes On, Leave It Alone
After the liquid begins bubbling evenly:
• Reduce the heat.
• Cover tightly.
• Avoid repeatedly lifting the lid.
• Cook until the liquid is absorbed and the rice is almost tender.
• Switch off and leave the biryani covered for 10 minutes.
That final rest matters because trapped steam can finish the grains without giving the bottom layer more direct heat.
Check the Rice Before You Fluff It
After resting, look for:
• long, separate grains
• no loose water at the bottom
• vegetables that still hold their shape
• rice that feels cooked rather than pasty when pressed
Open the lid and let excess steam escape briefly. Then use a flat spoon to lift the biryani gently from the sides instead of vigorously mixing through the centre.
Finish with the remaining mint and coriander, fried onions or a little lemon juice.
One Pot Still Needs the Right Order
The convenience of this biryani comes from reducing cookware, not reducing every cooking stage.
Give the masala enough time, measure the water, handle soaked rice gently and let steam complete the final cooking. Those decisions do more for fluffy grains than repeatedly checking the pot
FAQs
-
Why does one-pot biryani become mushy?
Too much water, repeated stirring or prolonged cooking can soften the rice excessively.
-
Can paneer be added?
Yes. Add large cubes shortly before the rice so they are not exposed to heat for too long.
-
Can biryani be made without curd?
Yes. A little extra tomato and lemon juice can be used, although the flavour will change.
-
Should biryani be stirred while cooking?
No. Fold gently before covering, then leave it undisturbed.
-
How long should biryani rest?
Keep it covered for around 10 minutes before fluffing the grains.